I just have to dedicate a post to this: the finishing of the dress. Although I planned not to post about it again until The Big Day, it is still dominating my life too much to ignore!


Today was dedicated to cutting shapes out of the lace remnants and then melting the edges of the cut-outs, to create the border around the neckline and down the back.
(And check out the rainbow cake that Little Son and I made. CHECK OUT how the little sugar balls look JUST like the heads of my pins…)

Pinning and re-pinning the shapes until just right. Acupuncture sessions for the Dressform!
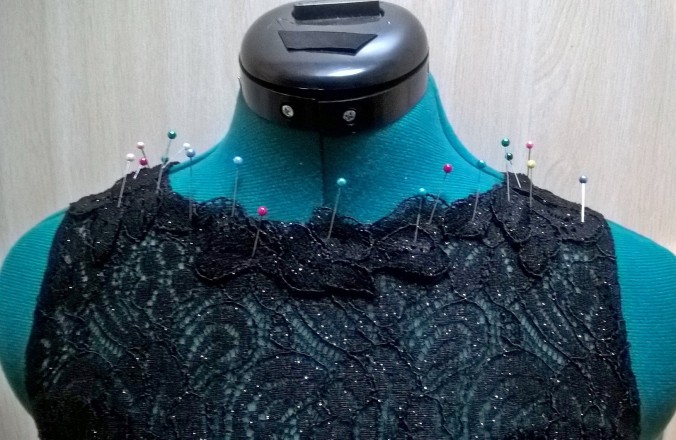

Tomorrow I shall hand-sew these shapes to the dress. I searched all over for miniscule silver, crystal, marcasite or hematite seedbeads. No luck! So it will have to be small black glass beads. Or tiny silver sequins? I still have to decide….
The hem was a great deal of fun. (Sometimes I am so sarcastic I scare myself). Marking it straight took a few days – on the kid, off the kid, measured from the floor, measured from the waist…then when I came to the point where I had to concede that I was NEVER going to get the thing even, I tried all ways of roll-hemming the silk chiffon before I gave up and chased all 6 metres of if through the overlocker. Did the same with the 6m of lining. The dress now boasts an overlocked picot edge. That was just the best I could do.
The bow still has to be positioned and tweaked into shape a bit. Originally, cut along the same (straight) grain as the skirt, it just disappeared on the skirt. So I re-cut it on the cross grain, and now at least the bow-ends do not just camouflage.

I made the bow in a double layer of chiffon (cutting instructions on the pattern is for single layer of fabric but that would NEVER work with chiffon) and also added a layer of silk organza between the layers to give it substance.
The Daughter loves the bow. She says it feels like a bustle.
I will make the bow detachable, so that she can keep it from getting too scrunched up while travelling to and from the photo session she and the boyfriend will have in the afternoon before the function.
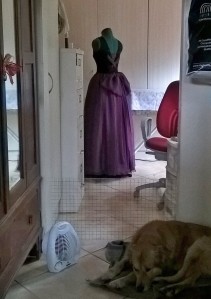
And finally, there is the innocuous black tulle petticoat. Although it is in position under the dress on the dress-form, it needs another layer. Or two.
Aaaargh. At this point I am willing to PAY someone to make the damn petticoat.
Anyone?

Wow! You are doing an amazing job. Almost at the finish line. Keep your chin up!
LikeLike
Thank you {-;
LikeLiked by 1 person
What can I say? Fabulous!
LikeLiked by 1 person
Getting there one stitch at a time {-;
LikeLike
I love the bow, the sarcasm (you got me!) and the cake you made with your boy. I’m sure you’ll finish in time and earn your daughter’s endless gratitude and admiration.
LikeLike
Thank you…I ‘ve been wondering a lot about that lately…would the process have been less stressful if I was not so secretly desperate for her respect and admiration? Bye. I’m off to see my therapist…
LikeLiked by 1 person
Clari ek weet nie hoe jy die tulle onderrok maak nie, maar ek het geleer uit ondervinding dat die rok baie mooier uitklok as jy ‘n onderrok van lining maak en dan die tulle eers intrek (so 3 of 4 lae) en net van bo die knie af in lae met verskillende lengtes aan die lining onderrok vasstik.Dan krap die tulle nie teen haar bene nie en dit val mooi ondertoe. Ipv om uit te klok van die middel af en te veel soos ‘n roomkoek lyk 🙂
LikeLike
Ek het die onderrok gemaak van pongee lining….net so wyd soos die rok (6m)…maar ek dink ek moes hom so 2m nouer gemaak het (4m). Sover het ek 1 laag tulle (6m wyd) bo oor die onderrok…en die obviously TE MIN! Ek hou van die watervalletjie-idee van die 4 lae tulle. Gaan dit probeer, net op ‘n minder wye onderrok.
LikeLike
Wat ek ook wou skryf is: Dit lyk absoluut stunning! Die materiaal en als is pragtig. Jou harde werk gaan deur en deur die moeite werk wees.
LikeLiked by 1 person
I made this dress. The bow was from a poly bridal satin from fabric.com. I cut it on a fold and put 4 layers of organza and 4 layers of netting. It gave it enough support to hold the shape. As for the petticoat, I ordered a five layered one from Amazon for 20 bucks. Best 20 bucks spent ever! I have pictures of it on my Instagram account. #rhondaleesweet. Love what you have done so far. It’s going to be beautiful.
LikeLike
I visited your instagram to have a look… WOW it is beautiful! Your skills are very impressive.
LikeLike
The bow does look like a bustle – very elegant. You’ve done some lovely work here.
LikeLike
Thank you! But seriously, I can’t wait to move on to other projects now!
LikeLiked by 1 person
Now, now you have to see this to the end… because we want to see it finished!
LikeLiked by 1 person
Beautiful! How did you make the bow detachable? My daughter wants the bow, but not the lacing.
LikeLike
Hi Kathy, in the end I did not make it detachable but I did use large snaps, the kind used on duvet covers, to keep it in position. Convince her to go with the lacing, it makes this dress so different from anything else out there! The bodice has no structure to keep it in shape as would have been with boning, so it might gape badly at the back without the lacing. Or put a bit of boning in if you take the lacing out. I am just wondering: did you browse all my posts about this dress, including the end result? Thanks for reading!
LikeLike